by Alisa
My nephew turned ten-years-old earlier this year. He's adorable and amazing and I knew he was learning to play chess, so when I saw instructions to make a chess set in the May 2021 Martha Stewart Living magazine I knew it was the perfect bday gift.
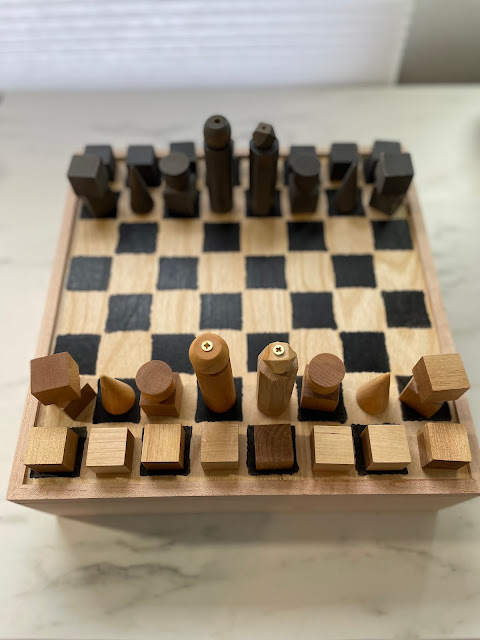
The online instructions don't include what I think is the best part of the set -- the combo storage box/board.


I had already purchased all the blocks -- there are a lot -- suggested in the Martha Stewart instructions, so I got to work on creating the Chess pieces. I took some liberties with the instructions as presented. Also, I had to do a bit of research since I am completely unfamiliar about how to play chess!
I used clear Gorilla Glue and some really handy tiny Irwin Quick-Grip clamps to put the pieces together. The black pieces were spray-painted a dark grey after assembly, and the white pieces were the unfinished maple with a bit of wax applied as a finish.

Here is s shot of the white king and bishop:

Since the pieces were a bit unusual, and possibly confusing to identify, I also marked the bottom of each piece to indicate their status: K for King, Q for Queen, Kn for the knights, etc.
As a bonus, I spray painted red and black discs so that the game set can be used to play Checkers, as well as Chess.

I added a personal message to the bottom of the box, and included a book on chess to complete the birthday gift.

He loved it!
 |
| I told you I didn't know how to play chess! |
Comments