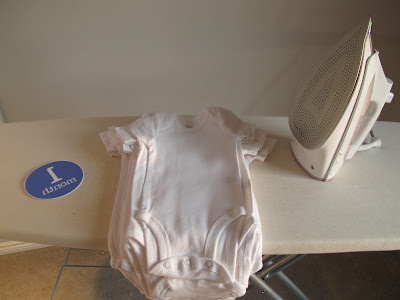
Baby's first year one-sies


I just made this for a baby shower.  I thought they turned out super-cute and can't wait to see my new nephew in them!

I got the idea from this blogpost on TipJunkie.  The download file and instructions are available here as free printable from Parties by Hardie

I hadn't used the iron-on transfers before and was really happy with how easy they were to use and how well they stood up to the wash.  One of them got a little damaged, but I think it looks cool.

I gave them as a gift along with a frame with 12 windows, one for each month's picture.  Now all we need is the baby to arrive!

-Alisa

PS - Jenn at Parties by Hardie has lots more neat printables available on her Etsy store.  (We used some of the Monkey Baby Shower images at the shower and they turned out adorable!)


Instructions

I used these supplies:


These are packs of 4 and come in sleeveless, short sleeve and long-sleeve options.  I bought one pack of the short-sleeves in each of these sizes: newborn, 3 months, 6 months, 9 months and 12 months.  I loved the long-sleeved ones, but trying to figure out what months would be long-sleeves vs. short-sleeves gave me a headache!


& my trusty Rowenta Focus iron

Step 1:
Download the file and print the transfers onto the Avery transfer paper.  Follow the instructions provided with the transfer paper.  I used the inverted images provided in the download file.

Step 2:
Cut out the transfers, stay close to the edge of the colored circle but leave a bit of non-printed white on the edge.

Step 3:
Assemble your onesies by size.  I used newborn size for month 1, 3 month size for months 2 thru 5, 6-month size for months 6 thru 8, 9-month size for months 9 thru 11 and 12-month size for finale month 12.
Step 4: Setup an ironing cloth (or a pillowcase!) on a hard surface.  Iron the onesie to remove any dampness, then lay the transfer face-down and press with hot iron for 1 minute. Make sure to cover the entire transfer.
Step 5:  Let onesie cool for a few minutes and pull off transfer backing.  Voila!
Step 6:  Wash in cool water (and Dreft), dry on low & touch up with iron.

Comments

Popular posts from this blog

Notes on Purl Soho Cross-back Apron pattern

Purl Soho Cross-back Apron, regular sized,  front view Purl Soho Cross-back Apron, regular sized,   back view by Linda Theil This is the Purl Soho Cross-back Apron featured on their website at  https://www.purlsoho.com/create/2015/11/20/cross-back-apron . Their page includes complete directions for making this one-size-fits-most apron with large, side-pockets and cross-back straps. This retro apron is so nicely made and looks so much like the apron my grandma wore in the Nineteen-fifties that I had to make one for my friend who appreciates the nostalgia and the beauty of this design. Although this apron pattern, as published, can adjust to several sizes from 2-10; I also made a larger option, adjusting the width of the pattern pieces to accommodate up to size 16 and up. Size adjustment may also be made by varying the length of the straps. These notes are a record of my experience with the pattern, and should only be viewed as commentary; y

Holiday weekender

  by Linda Theil Alisa's always cleaning house and often asking me if I want some item I'd given her before she sent it to a new home. I couldn't refuse the holiday-print, round table cloth I had bordered in red pom-poms forty years ago, even though she had slit the cloth to the center so that she could use it as a tree skirt. I decided I would make a holiday-getaway bag from the salvageable remnant. The olive-drab faux waxed canvas I ordered on sale looked really great with the old print. I used Diane Spencer-Ogg's outstanding "Escape Pod Travel Collection" patterns. Pictured below: The holiday themed “Weekend Bag” and "Travel Clutch" in olive-drab faux waxed-duck canvas from Sally Tomato , vintage holiday print exterior and interior, and accents of Mora bordeaux faux leather from Emmaline Bags . Pattern and video tutorial "Escape Pod Travel Collection: Weekend Bag and Travel Clutch" by Diane Spencer-Ogg. Weekend Bag front Weekend Bag bac

Sujata Shah's no-template piecing

16-inch, four-patch "pinwheel" block designed by Sujata Shah, pieced by Linda Theil 2016 Fabrics:  Sturbridge line by Kathy Schmitz for Moda and Daily Zen line by Michael D'Amore for Benartex. I attended quilt artist Sujata Shah's "Pinwheel" class sponsored by the Greater Ann Arbor Quilt Guild  at Washtenaw Community College in Ann Arbor  on July 17, 2016. Shah is inspired by the work of Gee's Bend quilters and has developed a no-template method of piecing to emulate their unstructured designs. Shah's book, Cultural Fusion Quilts , is available at Amazon.com.  Shah's uses four 11-inch squares to make each block, but she said a quilter could use any size base they choose. Since I had a package of precut 10-inch squares in the "Sturbridge" design by Kathy Schmitz for Moda, I based my block on that size. We were instructed to bring a variety of backgrounds in one color and brights in another color. Since I signed up late for