
E-Z Bird block

by Linda Theil 

I designed this easy bird block that would be cute on a baby quilt or placemat. I used the quilt-as-you-go technique to fill out my bird block with log-cabin style stripes to make fabric for a quilted tote. I used the Spencer-Ogg "Forever Shopper" pattern by Diane Spencer Ogg to make my tote. As a special feature, I added a swivel clasp and D-ring to secure the contents, or to use as a key leash.


This photo shows the back of the tote with quilt-as-you-go stripes. I added diagonal quilting before construction.

This is a photo of the quilted fabric before tote construction.

How to make an E-Z Bird block


This is the E-Z Bird block with log-cabin sashing. The beak is a prairie point inserted in the seam between the bird body and the first row of sashing. This block as constructed according to these instructions is 15.25 x 14.25-inches.

For one E-Z Bird block you will need: scraps of four contrasting fabrics. For the background, you will need scraps for snowballing the bird body, and 52-inches of 2.5-inch-wide background strips for sashing.

Cutting instructions for 15.25 x 14.25-inch E-Z Bird block

From four different colors, cut:
Head: 11.5 x 4.5-inches
Breast: 3.5 x 6.5-inches
Body: 8.5 x 6.5-inches
Beak: 3.5-inch square

From background fabric, cut:
2.5-inch square
3.5-inch square
4.5-inch square
6.5-inch square
53 inches of 2.5-inch wide sashing

Directions

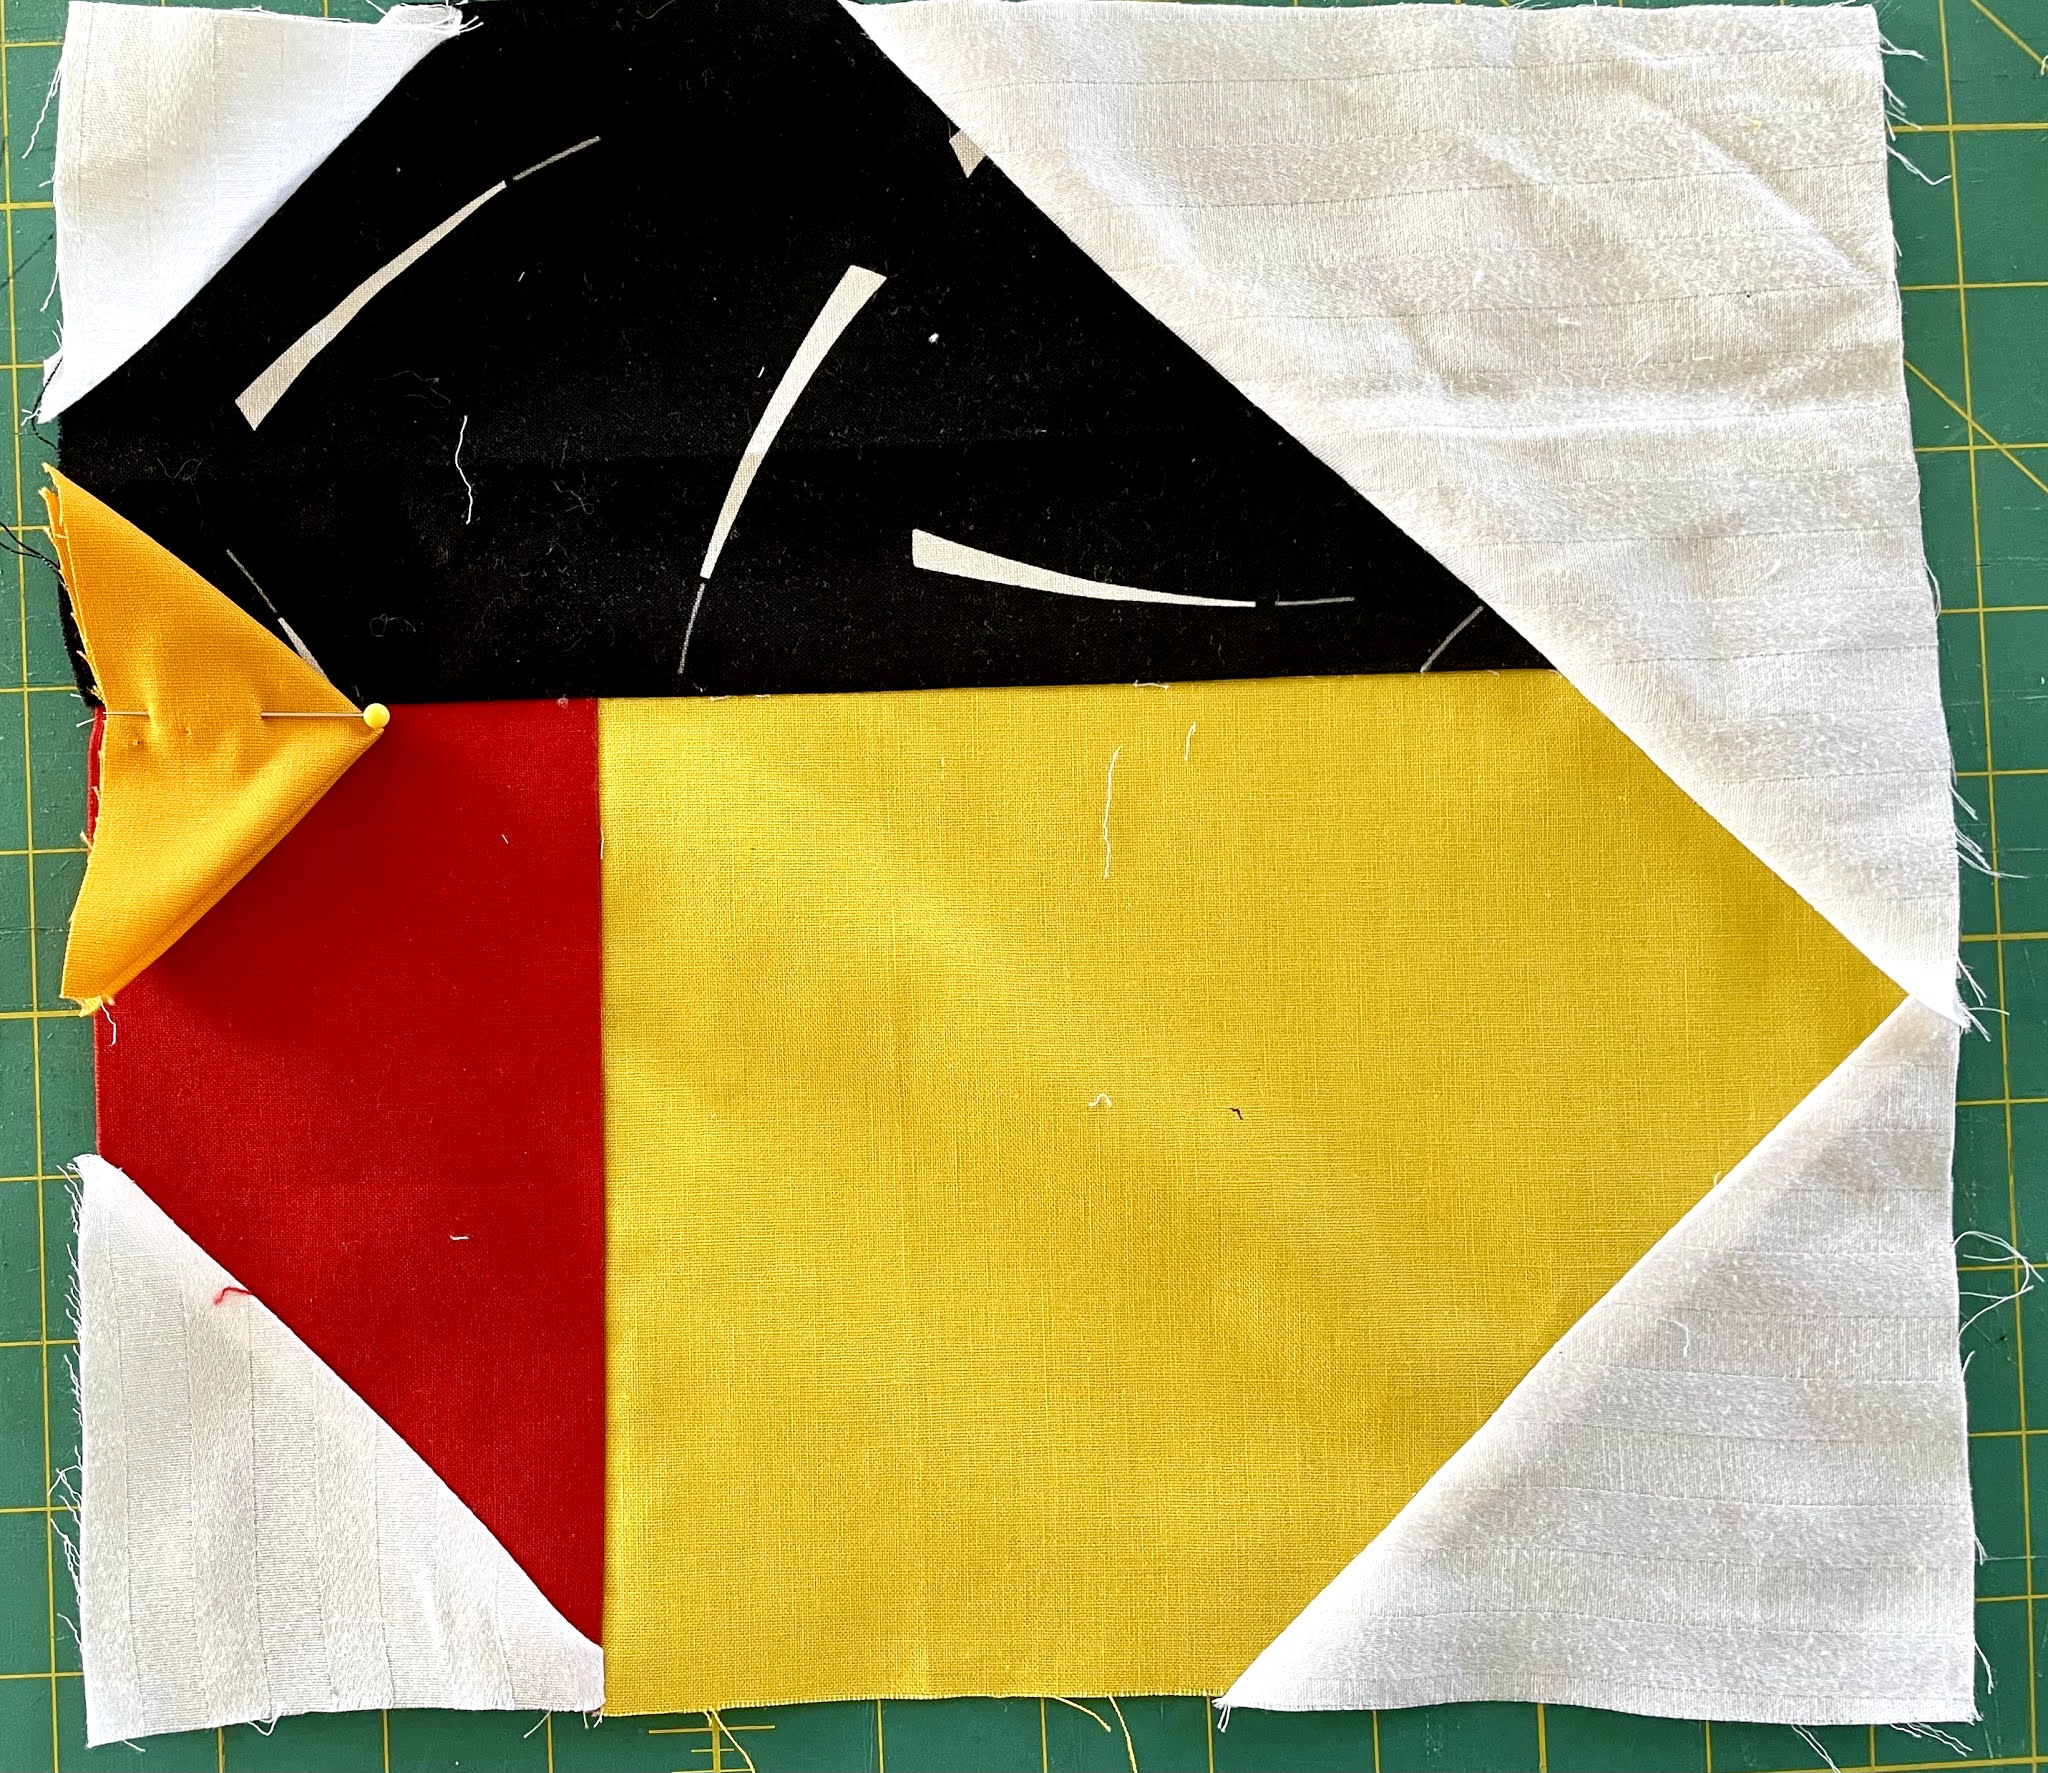
Fold the 3.5-inch square for beak in half, diagonally; fold in half diagonally, again. Baste across raw edges. Set aside. The beak will be inserted into the seam between the bird's head and the left-hand strip of sashing.

Snowball 2.5-inch square background fabric to upper left corner of bird's head.
Snowball 3.5-inch square background fabric to bottom left corner of bird's breast.
Snowball 4.5-inch square background fabric to bottom right corner of bird's body.

Trim and press open.

Sew bird's breast to body, as shown.

 Sew breast/body section to bird's head, as shown.

Place 6.5-inch square on top right corner of bird block, as shown.

Snowball, as shown. Trim.

Press open.

Place bird's beak along left side of bird block with raw edges even, and point of beak pointing toward back of bird. Place where you would like to see the beak. The bird on my tote has his beak even with the angle of his head. The demo bird has beak placed further down on head.

Secure with pin or basting.

Stitch a piece of 2.5-inch wide sashing along entire left-hand side of bird block, enclosing raw edges of beak in seam.

Press seam open.

And press beak toward outer edge of block.

Stitch another piece of 2.5-inch sashing across top of block, in log-cabin fashion. Press open, and continue around other two sides of block.


The finished block measures 15.25 x 14.25-inches. For a placemat or tote, continue log-cabin strips, or striping to desired size. Embroider, applique, sew on a button, or pin jewelry or tie tack to indicate bird's eye. Add a pom-pom, or another prairie point for a tail, if desired. 

Resources


Comments

Popular posts from this blog

Scrappy log cabin blocks

by Linda Theil Scrappy Log Cabin quilt block by Linda Theil  Next month the Greater Ann Arbor Quilt Guild will host a virtual quilt-along to make quilts for the SafeHouse Center womens' shelter in Ann Arbor, Michigan. One of the suggested blocks to make at the event is a Scrappy Log Cabin suggested by GAAQG member and artist Mary Bajcz. I love the Log Cabin block design and decided to get a head start on next month's event by organizing my materials and develping a process for making my Scrappy Log Cabin blocks. I began by watching Mary's YouTube video: "Scrap Quilt Strategy: The Log Cabin Technique" , and many others available on the topic. What a variety of approaches!   I'm not much of an improvisor and this is the first time I've tried the scrappy approach to quilt making. So It was quite an adventure for me. I pulled out my scrap bin and began sorting for lights and darks. After looking at many videos, I decided to work with a central square of 2.5-i...

Notes on Purl Soho Cross-back Apron pattern

Purl Soho Cross-back Apron, regular sized, front view Purl Soho Cross-back Apron, regular sized, back view by Linda Theil This is the Purl Soho Cross-back Apron featured on their website at  https://www.purlsoho.com/create/2015/11/20/cross-back-apron . Their page includes complete directions for making this one-size-fits-most apron with large, side-pockets and cross-back straps. This retro apron is so nicely made and looks so much like the apron my grandma wore in the Nineteen-fifties that I had to make one for my friend who appreciates the nostalgia and the beauty of this design. Although this apron pattern, as published, can adjust to several sizes from 2-10; I also made a larger option, adjusting the width of the pattern pieces to accommodate up to size 16 and up. Size adjustment may also be made by varying the length of the straps. These notes are a record of my experience with the pattern, and should only be viewed as commentary; your results may vary. ...

Advent star

by Linda Theil Alisa made me a beautiful Advent calendar long ago and every year she fills it with goodies in anticipation of the Christmas holiday. Last Christmas, every pocket contained two rolled-up strips from a "jelly roll" precut package of "Holiday Florish Festive Finery" by Robert Kaufman. I wanted to use the fabric right away and not allow my gift to disappear into my tub of holiday galore. After searching my patterns for a block that could be made with "jelly-roll" strips, I decided to redraw a "Christmas Star" block in a size that would use the 2.5-inch-wide "jelly roll" strips. This redraw resulted in a 10-inch block before finishing, and not including the 2.5-inch sashing I added later. For construction I used the method described by Brigitte Heitland in her "Christmas Star" pattern. This was a free pattern that I no longer find available through her website. The block looks very intricate, but Heitland's con...