This tote was inspired by the clever MUJI tote my friend Rosey got from her friend in New York. The original was made of one layer of ripstop nylon with flat-felled seams. This one is cotton with a lining. You can order shibui MUJI products online at the Museum of Modern Art.
Directions for MUJI-homage tote
Make your pattern out of medium weight interlining fabric 31.5-inches long by 15 inches wide.


1. With the pattern's long, straight edge on the fold of the fabric, cut four pattern pieces: two of exterior bag fabric and two of lining fabric. I used cotton for both exterior and lining. (If you wish, you may cut pattern pieces from four different fabrics, as I have in this demo.) You will need a 7/8-yard (31.5 inch by 30 inch) cut of fabric for each of the four pieces cut from your pattern.
(If you wish to interline, cut two interlining pieces and baste to wrong sides of bag exterior pieces. You will need two 31.5 by 30-inch cuts of interlining for each bag.)
NOTE: After making several bags, we have decided that a longer handle is nice, so we have been using 36-inches of fabric along the fold -- a full yard instead of 7/8-yard. Also, if the fabric is not directional, you may piece the two lining-fabric cuts by seaming the foldline.
2. With right sides together, using a 3/8-inch seam allowance, stitch one exterior and one lining piece together, following around all curved edges, matching arrows and leaving the straight edge at the bottom open.
3. Clip seam allowance every one-inch.

4. Turn, and press.

5. Repeat for second exterior and lining piece.

6. Fold each piece in half with right sides out. Press. You now have two identical bag pieces, ready to be stitched together.
7. Lay one bag piece open flat on a surface with the lining side up.
8. Place the second bag piece (which is folded in half) over the flat (opened) bag piece. Place so that all raw-edged bottoms are even with each other. The curved, outside edges of the folded bag piece should meet at the center of the flat opened piece, as shown below.

9. Fold the flat bag piece over the folded bag piece -- sandwiching the folded piece -- with all raw edges on the bottom even.

10. Pin two layers of the purse together at V-shaped intersections at the top of the bag.

11. Continue pinning along edges in preparation for stitching bag pieces together. Do not pin bottom. (Baste, and remove pins before machine stitching, if desired. Basting makes the slightly complex process of stitching two layers together in what amounts to a tube, slightly easier. If you choose to baste, follow directions for second piece of the bag, and baste both bag pieces before stitching on the sewing machine.)

12. Topstitch through two lined bag-layers all the way around one bag piece. (You will be sewing through several layers of fabric, so make sure your needle is new and of the correct size for your fabric. I used a 12 for the lightweight cottons in this sample.)

Be careful not to stitch through other side of bag – stitch all the way up and around the tie end.

13. To form exterior pocket, make bartacks six or eight inches apart at top of one exterior curved edge, then clip the stitching between bartacks to open a pocket.
14. Turn bag inside out, repeat pinning and topstitching with the second lined bag piece, as described above.

15. Bartack six-inches apart at top of one curved edge, form interior pocket on opposite side of bag from exterior pocket. Clip stitching between bartacks to form pocket.
16. Turn bag right-side-out. Fold bag with raw edges at bottom even. Trim bottom so that all edges are even. (Note: depending on which way you fold the bag, your ties will either emerge from the sides or the middle of your bag. Alisa doesn't like the bag folded with the ties emerging from the middle 'cause it doesn't lie flat against your side when worn over the shoulder.)

17. With wrong sides together (right sides out, as left after trimming bottom edges), pin and stitch using a one-quarter-inch seam allowance along the bottom of the bag.
18. Turn bag inside-out, press across bottom of bag, pin, and stitch with 3/8-inch seam allowance across bottom of bag -- enclosing seam allowance from first stitching line.

19. After stitching, turn the bag right-side-out; push out corners.

20. Knot tie ends to form handle for bag.


To pack, unknot and fold flat in suitcase or purse.
Susan's tote:

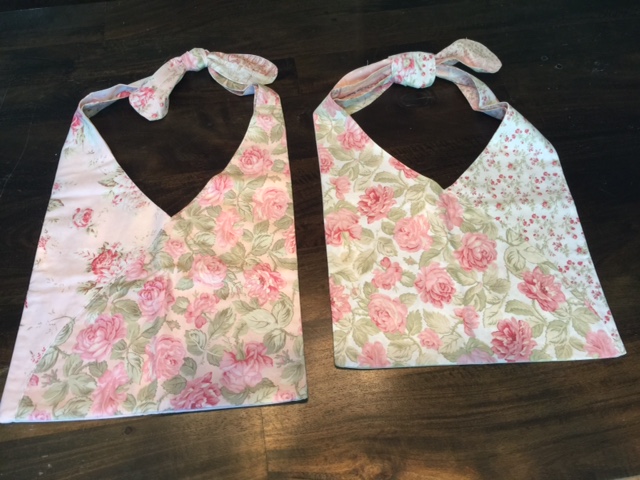
UPDATE September 25, 2016: Made two totes for Trish and Jennifer from pieced florals. (Photo below)
Photo by Alisa Theil


Comments