by Linda Theil
June 2, 2018
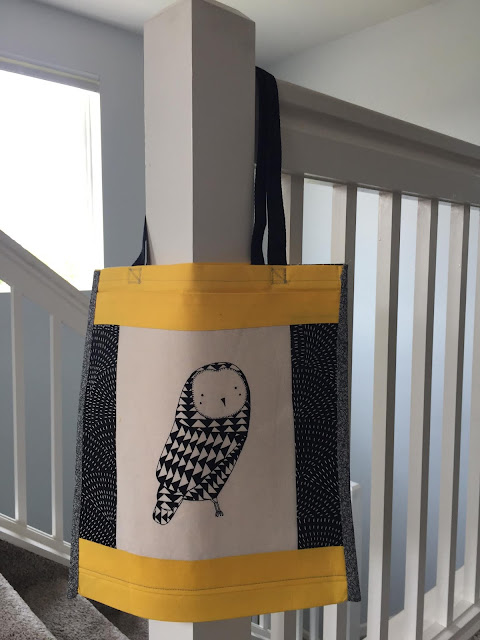
This is a simple, shopper tote bag modeled on the inexpensive fabric totes available at grocery stores. You can make this bag with, roughly: a yard of fabric, two yards of iron-on interfacing, and four feet of woven belting -- or less if you like shorter handles on your tote. The print fabric I used is from the "Thicket" line by Gingiber Zest for your Nest for Moda in 2016. The yellow is probably a Moda Bella Cotton Solid.
Materials:
- bag: cut 14-inch x 42-inch bag piece of cotton fabric
- bag: cut 14 x 38-inch piece of lightweight, iron-on interfacing to line bag piece
- gussets: cut two 8 x 15.5-inch gussets from coordinating fabric
- gussets: cut two 8 x 13.5-inch pieces of lightweight, iron-on interfacing to line gusset pieces
- pocket: cut one pocket from feature fabric 14 x 14-inch square
- pocket: cut 14 x 14-inch pocket lining from same or coordinating fabric
- pocket: cut 14 x 14-inch pocket interfacing from lightweight, or medium weight iron-on interfacing
- handles: four feet of woven belting in a coordinating color to use for two handles on tote. Cut into two two-foot-long pieces
- 2.5 yards of binding to coordinate or contrast with your main fabric. To make binding, you will need to piece two-inch wide strips to make 90-inches of binding before folding and pressing.
Prepare bag.
Cut iron-on interfacing to fit bag body, leaving two inches at top and bottom for hems. Iron interfacing to wrong side of bag fabric.

Fold top and bottom hems over one inch and press, then fold again one-inch and topstitch the hem. Finished hems shown.

Complete pocket.
Iron interfacing to wrong side of pocket fabric.
With right-sides-together, place pocket lining on top of pocket, and stitch along top and bottom of pocket.
Turn tube of pocket and lining right-side-out, and press. Set completed pocket aside.
Fold bag.
With right-sides together, fold interlined bag piece in half and press, marking the center of the bag with a crease.
Measure four inches on either side of the central crease. Fold with wrong-sides-together and press, marking both of the the four-inch lines with a crease, as shown.
Your bag is now shaped with a front, folded-bottom, and back of the familiar grocery market bag.
Attach pocket.
Unfold bag and position completed pocket on front of bag.
Stitch securely across the bottom of the pocket, attaching pocket to bag, leaving the sides and top open. Or, if you like, you may baste the sides in place, but leave the top of the pocket open.
Prepare bag sides.
Cut two bag sides of contrasting fabric.
Press lightweight, iron-on interfacing to wrong side of side pieces, leaving two inches un-lined at one end of each side piece.
Fold unlined, fabric down one inch and press.
Fold over one-inch, again, and stitch down to create top hem of side-piece. Repeat for both side-pieces. Set both aside.
Attach handles.
Cut handles into two 24-inch lengths (or whatever length you desire -- no shorter than 12-inches long).
Position one handle on the back of the bag with handle ends on the inside of the bag three inches from each side. Repeat for front of the bag.
Clip handles in place.
Stitch handle-end to top of bag using a zig-zag stitch. Stitch in a square to secure. Repeat with all four handle ends.
Note: it is easier to stitch the handles on before adding the sides of the bag because the tops of the bag are free, and easier to work with.
Attach sides to bag.
With hemmed tops even, clip one bag side to sides and bottom of bag.
At bottom corners, ease the bag piece by clipping about 1/4-inch into the seam allowance. This will make it easier to fit the side into the bag piece, but some easing will be required to fit the side in place.
Baste in place, then machine stitch side to bag. Repeat on other side.
Fold-over short end of binding, and with right-sides-together, apply finished end to top of bag. Cut end of binding about one-half-inch longer than side, and turn the extra length under to form finished edge on end of binding.
Stitch binding to both bag and bag-side.
Repeat on other side of bag.
Fold binding over seam, and clip in place.
Miter binding at corners of bag bottom.
Repeat for other side of bag.
Both sides of bag with binding clipped, and ready for hand-finishing.
Close-up of binding.
Hand-stitch binding to bag front and back. Repeat on both sides of bag.
 |
| Completed market tote bag |


Comments